You should use self-scheduling if you are doing recruitment on a regular basis and regularly have multiple candidate you need to book into multiple slots for Interview or Discovery Session. It allows candidates to view your availability and schedule themselves into a time slot.
This will save you time if you are doing large scale recruitment, however, if you are only dealing with a few candidates at a time or recruit infrequently you may wish to arrange with the candidate directly over the phone or by email. If you would like to use the candidate self scheduling functionality for your role you should begin by creating calendar with your availability.
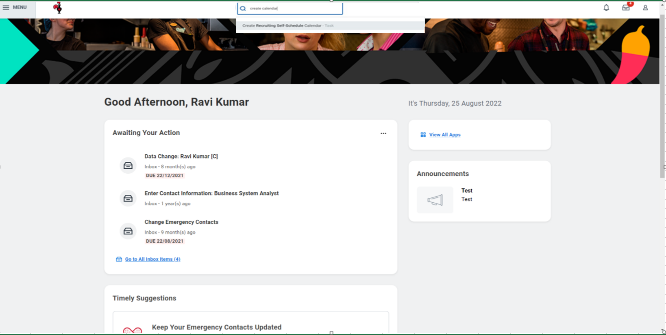
1. To do this from the homepage type in ‘create calendar’ into the search bar and select “Create Recruiting Self-Schedule Calendar”
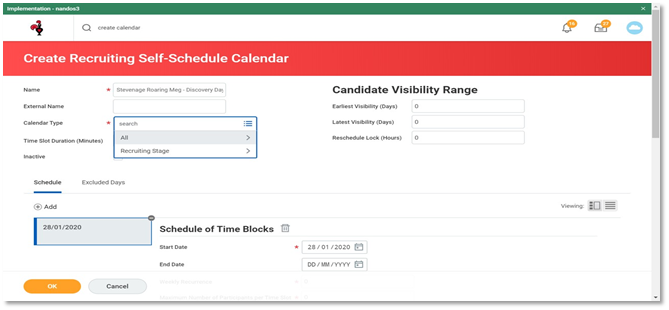
2. In the ‘Name’ box give your Calendar a name that is unique to your restaurant, preferably with the name of your restaurant and the recruitment stage it will be used for e.g. Discovery Session. You can then update this regularly with your availability rather than creating new ones for each job. There will be guidance on how to update and edit later in the guide.
In the Calendar type section select ‘All’.
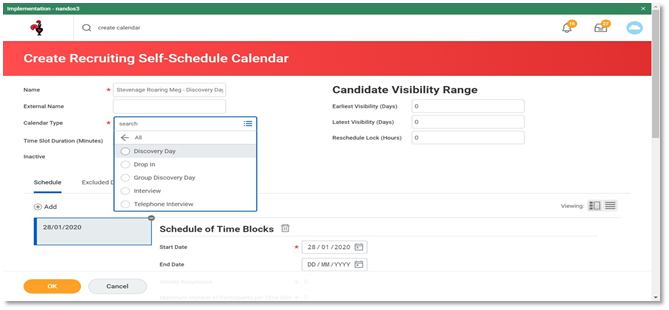
3. Then select the recruiting stage you will be using candidate self-scheduling for e.g. Discovery Session.
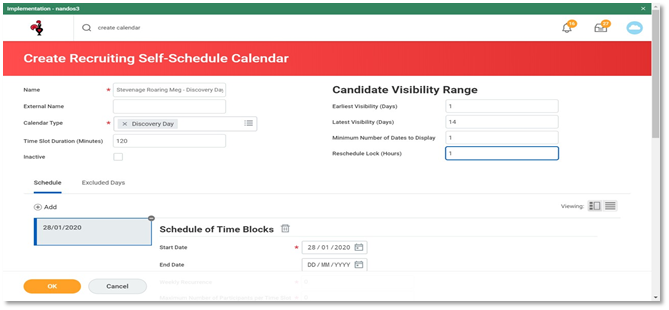
4. Enter the time slot duration in minutes. Enter the ‘Earliest Visibility (Days)’ – this is the soonest a candidate will be able to view availability for. Latest Visibility (Days) – this is how far into the future you want them to be able to see availability.
Minimum Number of Dates to Display should also be entered as well as “Reschedule Lock (Hours)” - this is how close to the time of their scheduled slot will you allow them to cancel and reschedule online without calling you.
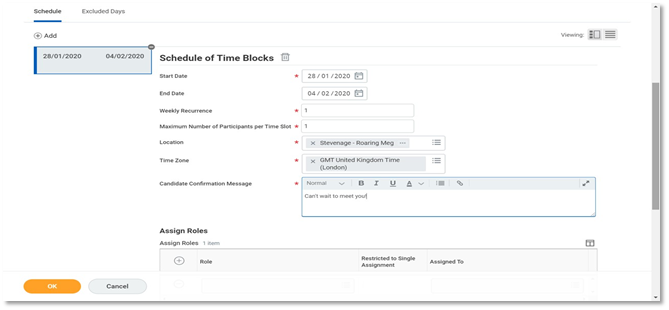
5. Scroll down to the “Schedule of Time Blocks” section. Enter the start date (the date in which you want to run your calendar from) and enter End Date (When you are running your calendar to) – Please note if you are creating a calendar for more than one week, any availability you put in for Monday will be replicated across each week.
In weekly occurrence enter the number of weeks you want to run the calendar for.
Fill in the “Maximum Number of Participants per Time Slot”.
Type in the location of your restaurant and click enter to select your location. The time zone should then default.
In the candidate “Confirmation Message” you can put a personal note that the candidate will receive when they select their time slot.
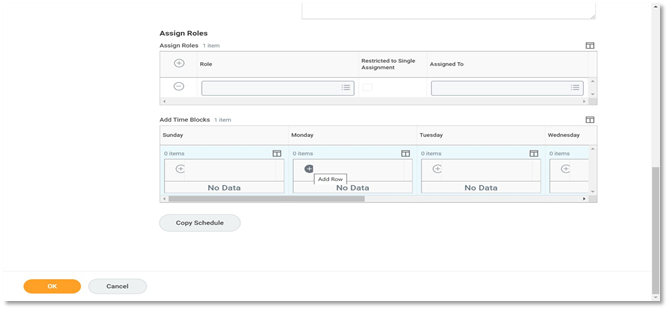
6. Ignore the assign roles section. In the add time blocks section press the plus icon on your selected day to add a slot.
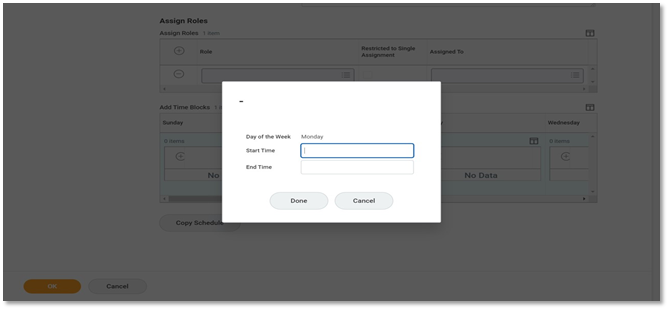
You can put in multiple slots or the whole day and the system will automatically divide the time into slots of the duration you specified previously.
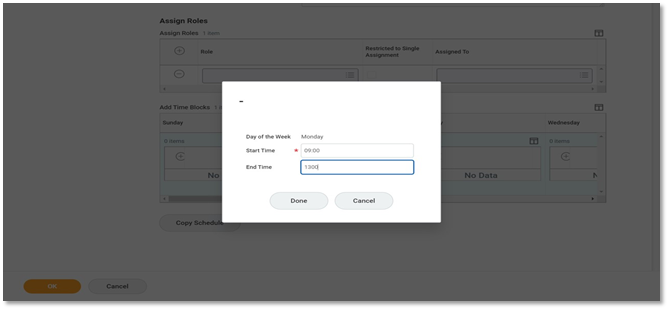
Click “Done”.
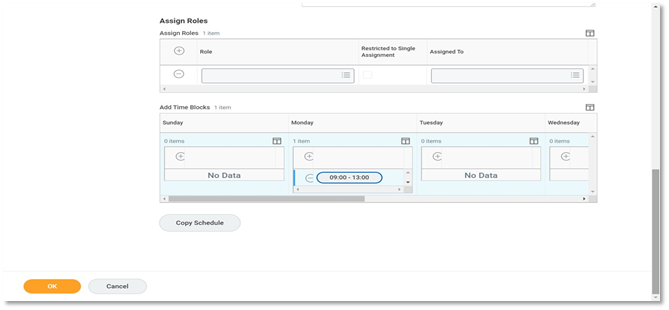
7. Once you have filled in all the available slots across the week click “OK”.
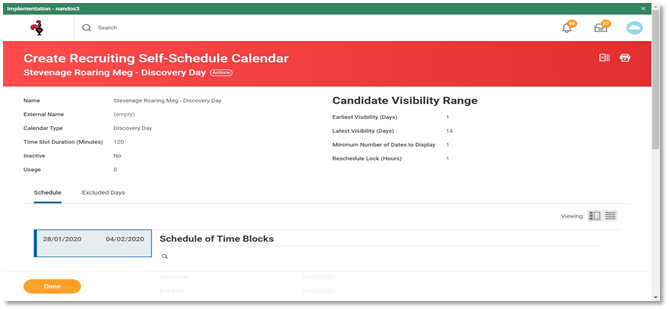
Click “Done”.
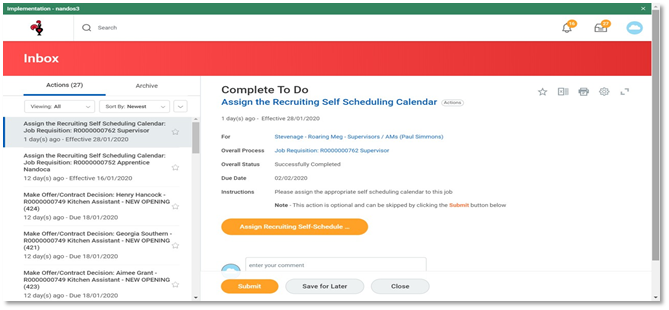
8. When you create a requisition you will receive a to do task in your inbox asking if you would like to assign a recruiting self-scheduling calendar. From here click ‘Assign Recruiting Self-Schedule’.

9. You can then select an active calendar or create a new one (to create a new one follow the previous steps).
Select “Active”.
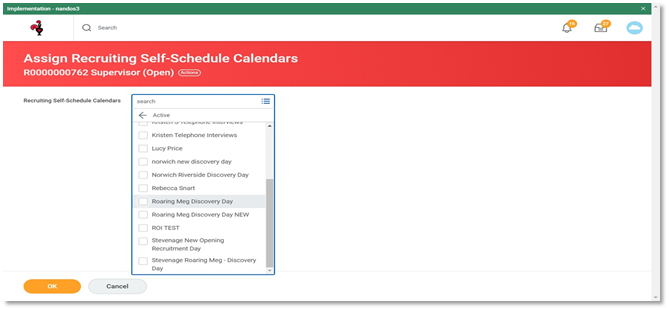
You will then be shown a list of all the active calendars. This is where it is important you have set the name of your calendar to your restaurant so you can easily find it. It is also essential that if you are no longer using a calendar that you set it to inactive so it doesn’t appear in this list.
Select your calendar and click “OK”.
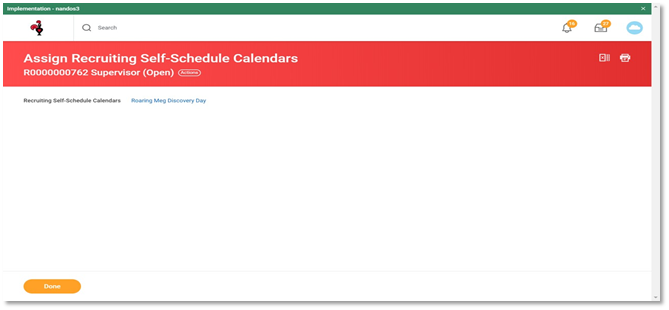
Click “Done”.
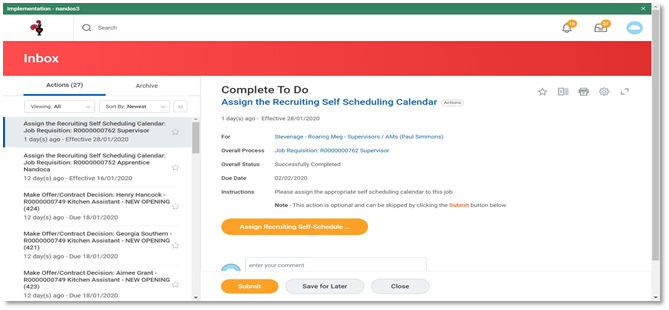
10. You will now be returned to the to do task in the inbox. Press “Submit”.
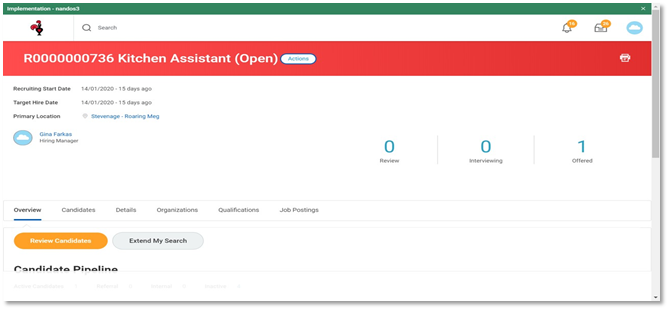
11. If you want to assign a self-schedule calendar to an existing requisition start from the Requisition and click on the “Actions” button next to the requisition title.
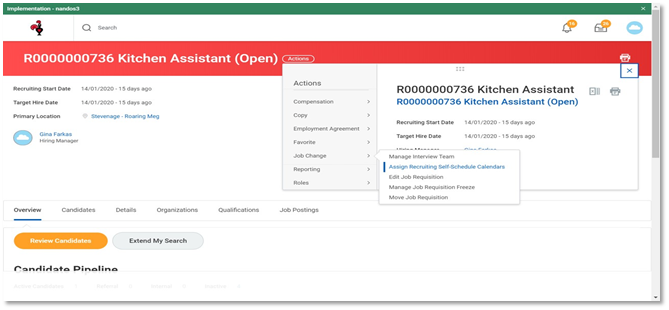
Hover over “Job Change” and select “Assign Recruiting Self-Schedule Calendars”. Follow the previous steps in the guide.
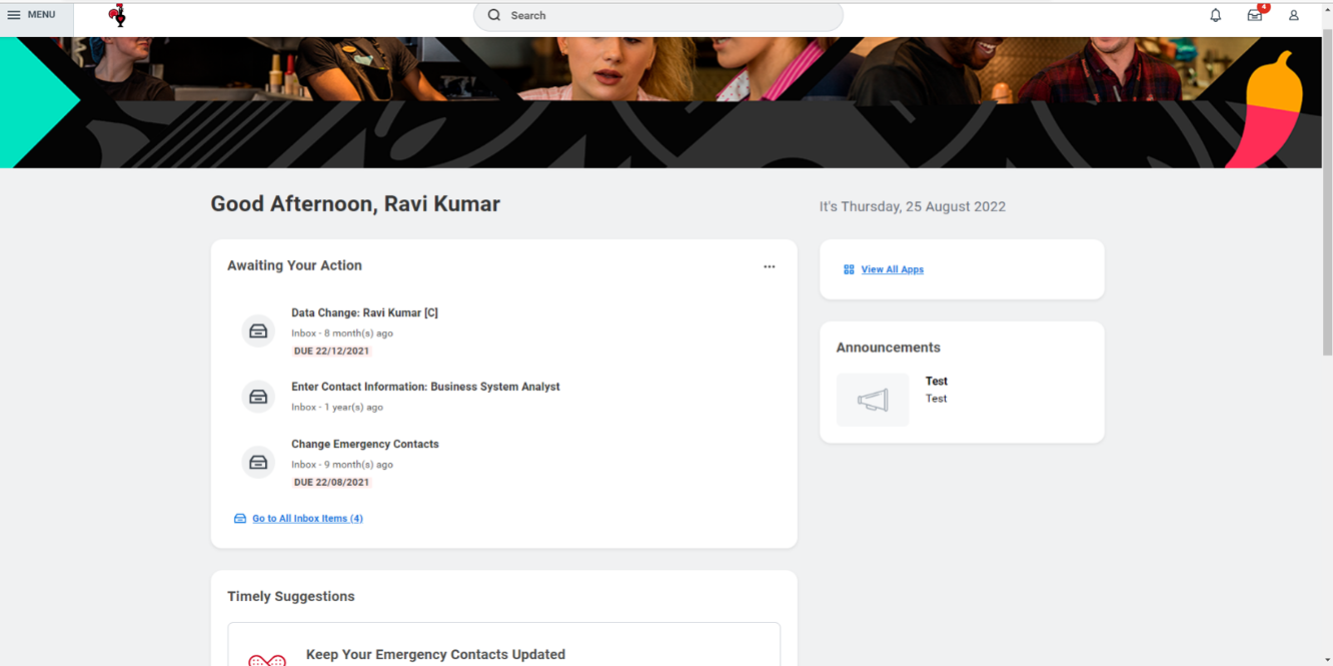
12. To view the candidates that have booked slots start from your homepage and click on 'View all apps' and then the Recruiting Dashboard.
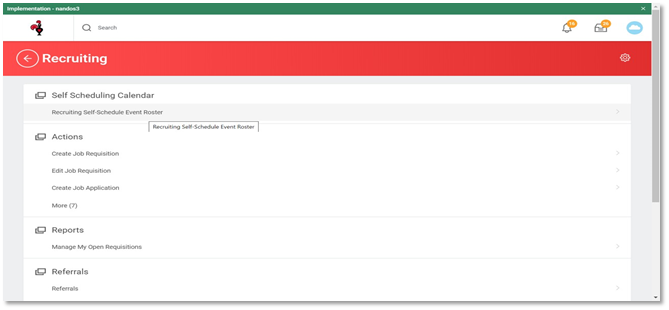
13. Click on “Recruiting Self-Schedule Event Roster”.
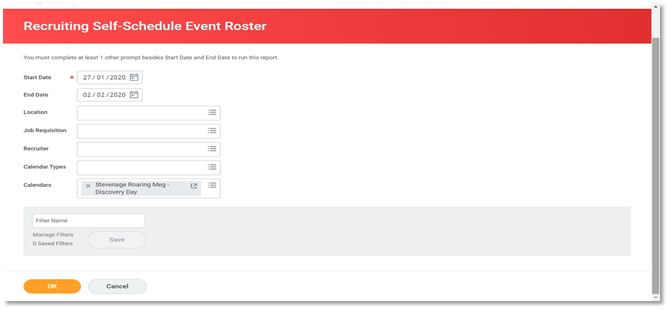
14. Enter the start and end date for the period of time you want to view your booked slots for and select the calendar you wish to view.
Click “OK”.
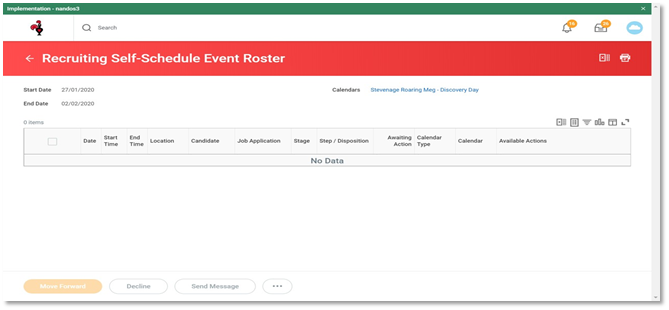
You will now see a list of all the booked slots for that calendar and time period. You can access the candidate profile by clicking on their name from here.